How to create an infrared effect photo using PHOTOSHOP
how to reflect the colors of a landscape by turning green into a vibrant pink to mimic the effect of the common camouflaged infrared colors.

In the infrared rendering display we saw, the images look beautifully surreal when color is mixed, especially in images with lots of trees and foliage. We'll duplicate the effect using a natural image, but with some Photoshop adjustments to invert the channels.
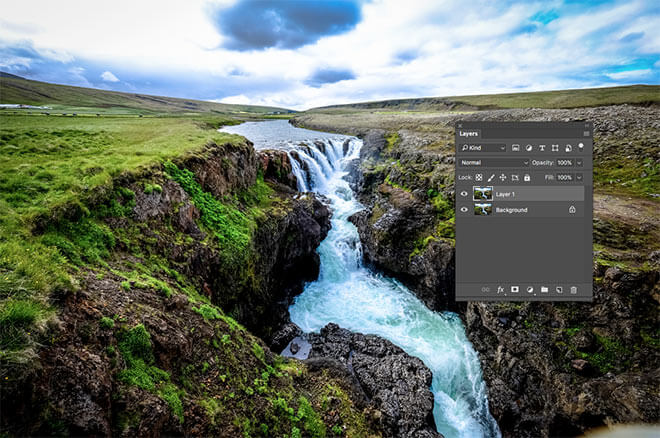
Open your landscape image in Adobe Photoshop. I'll be using this landscape image, which has a nice mix of green and also has contrasting tones in the sky, river and rocks. Start by duplicating the layer with a shortcut CMD+J.
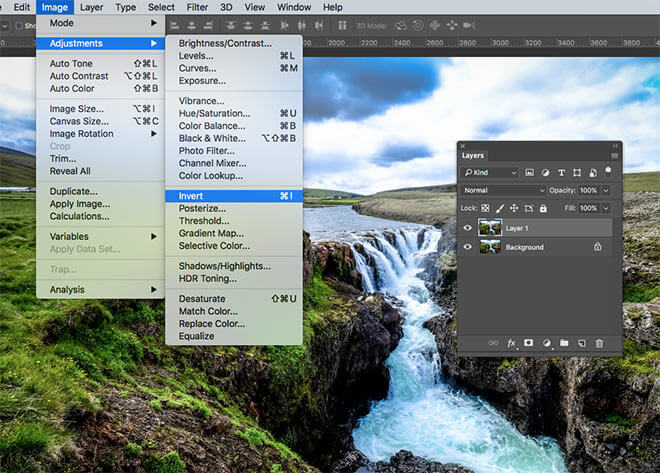
Invert the duplicate layer by going to Image> Adjustments> Invert , or by using the keyboard shortcut CMD+I.
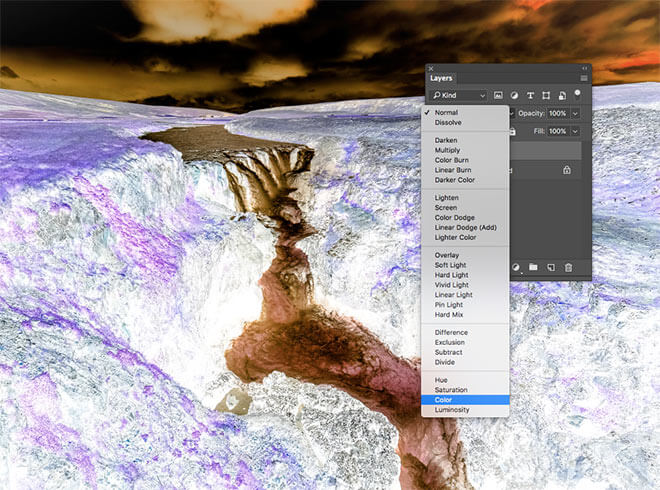
Change the Blending Mode for this inverted layer to Color. This step reflects the colors of the image while removing the negative effect.
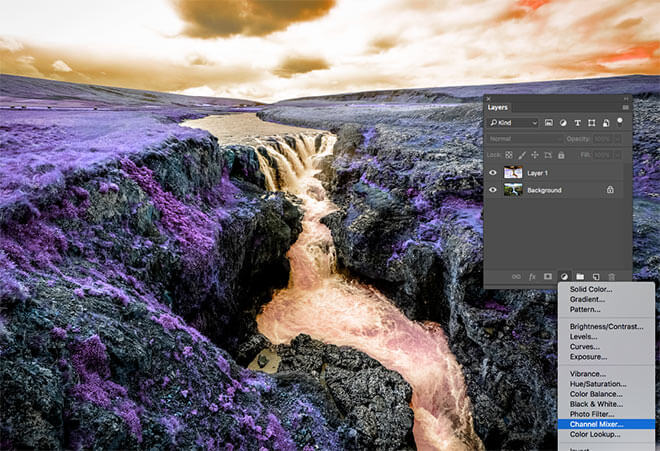
Color tones do not fully reflect how they appear in authentic infrared images. To solve this problem, add a Channel Mixer adjustment layer.
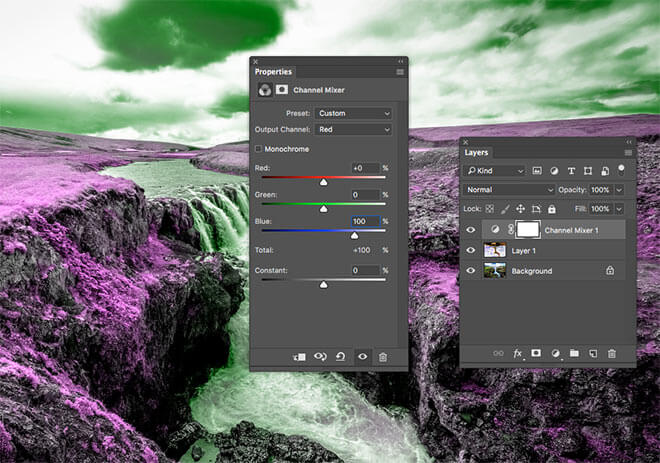
Under the default channel for red output, reduce the red color slider to 0 and increase the blue color slider to 100%.
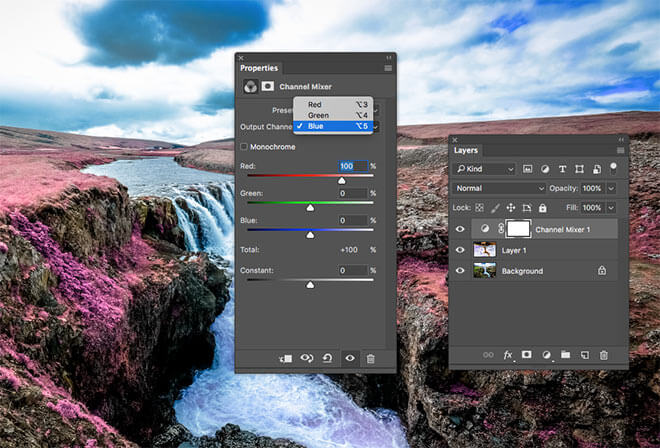
Change the Output Channel menu to blue, then increase the red slider to 100% and reduce the blue slider to 0. This will swap the red and blue channels, which return the correct color of the sky and the water, but the green foliage gives that pink look in an infrared style Brilliant red.
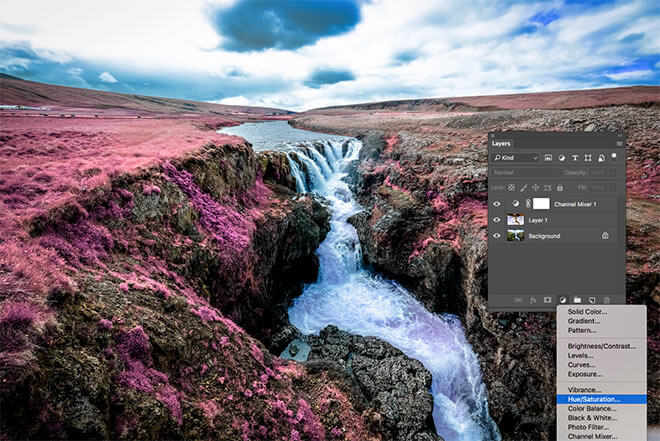
Now, we have to correct the colors to represent the infrared effect, but the colors are a bit dull. Add a Saturation / Hue Adjustment Layer.

Change the dropdown menu to only red effect, which will let you enhance the vibrancy of pink areas without ruining the saturation of the entire image.
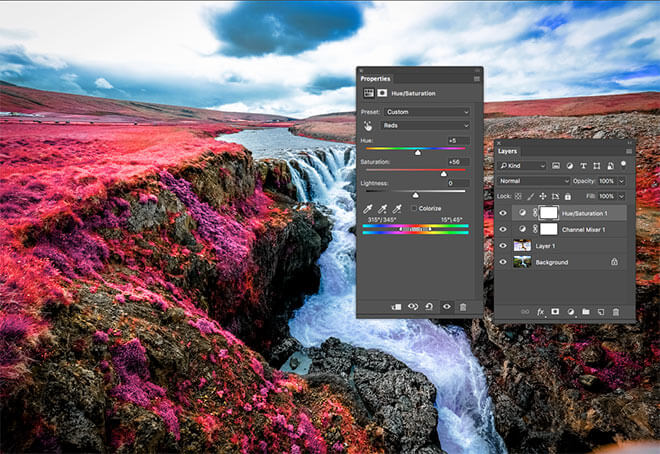
Increase the saturation slider to make the pink areas more vibrant, then carefully drag the tone bar to find the best balance between red and pink.

Change the dropdown menu to purple and change the sliders to correct the color to a slightly purple-red color. Raise the saturation and correct the hue to give them more of a red, pink, or blue look.
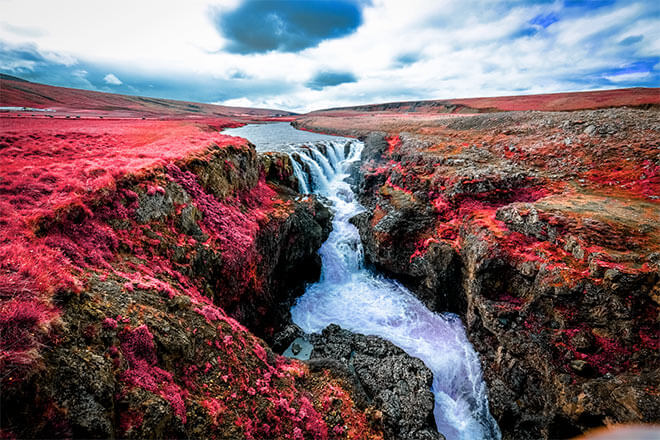
The end result is a photorealistic infrared effect, with vibrant pink foliage, which gives the landscape image a surreal look, almost like an alien planet. By simply inverting the colors and switching the existing red and blue channels, we can directly replicate the beauty of authentic infrared images in Photoshop.
تعليقات
إرسال تعليق