How to change the weather from summer to winter in Photoshop
In this Photoshop lesson, we will learn how to control the weather and change the seasons by using some tricks in Photoshop. In this lesson, we will convert a bright summer sunshine landscape into a snowy winter scene. We'll make adjustments to the colors to get a cooler atmosphere, then use smart selection tools to add snow cover to the woods. Then we'll finish the design by adding snow cover over the entire scene.

This Photoshop trick works best for landscape photos with lots of trees and grass. There are three basic steps to doing the work: washing the colors to remove warm summer tones, applying a snow-white shade, then finishing the design with a realistic snowstorm.
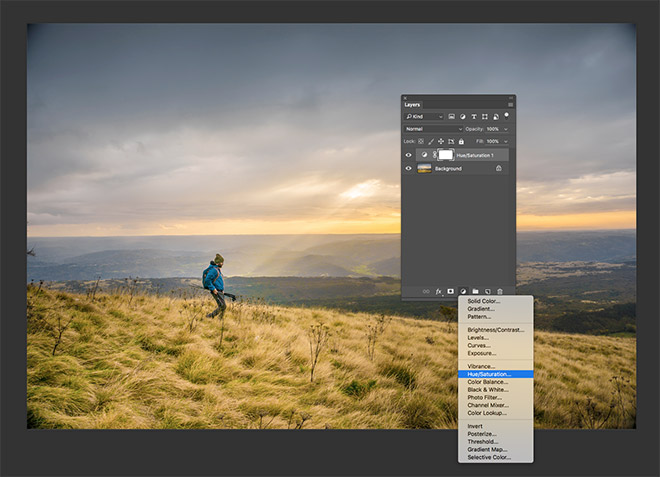
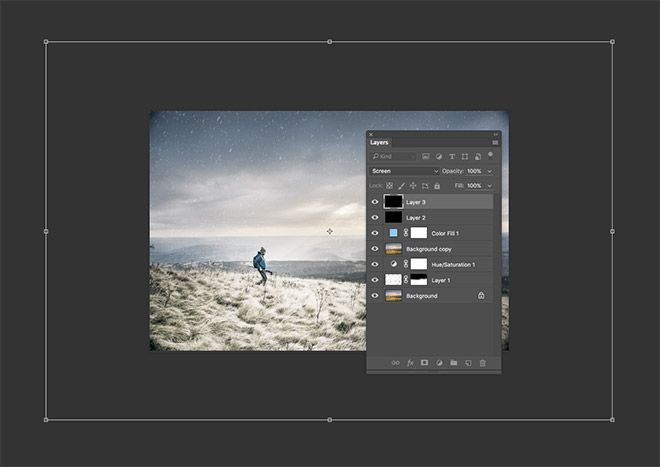
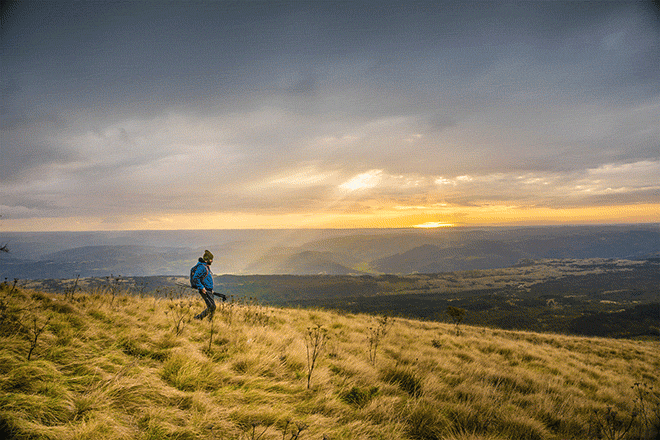
Open the desired image in Photoshop. I used this image from Unsplash.com . Add a Hue / Saturation adjustment layer via the Add Layer Adjustments icon located at the bottom of the Layers panel.
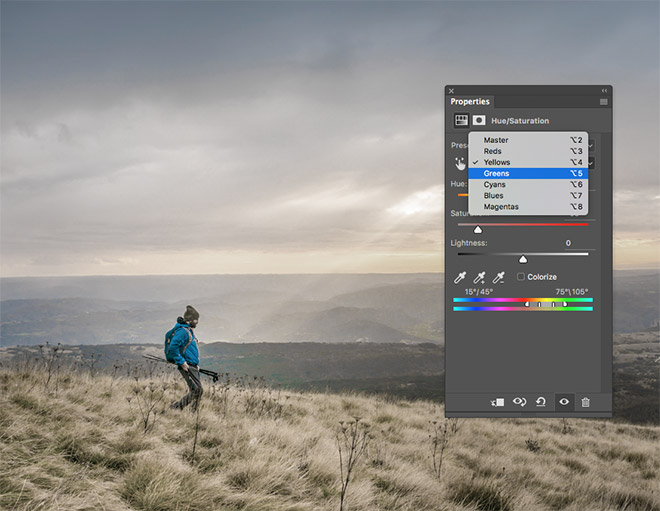
Adjust the dropdown options from Master to various color channels and reduce the color saturation value while viewing a preview of the results and choosing the best result. The goal of this process is to remove warm tones to give your photos a cold winter's feel. The red channel does not usually need major adjustments as it depends on the nature of the subject, while the yellow and green channels need a major softening to remove the vitality and warmth of the herbs and foliage. Finally, adjusting the blue and sky channels will help make the clear skies overcast.
Choose the background layer and then go to the menu
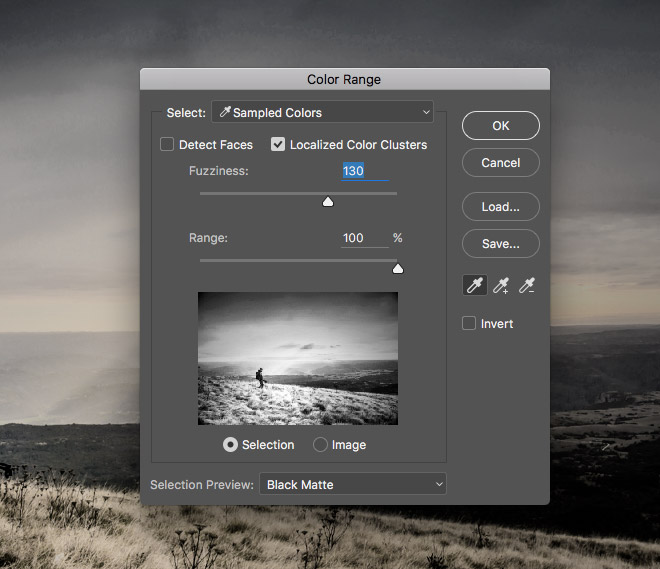
Select > Color Range
Change the Selection option to Sample Colors, then click on the image to choose different color tone swatches. Try to look for a color that provides good contrast as you follow the small preview window and see the result. The fuzzy latch can be adjusted to adjust the brightness of the selection.
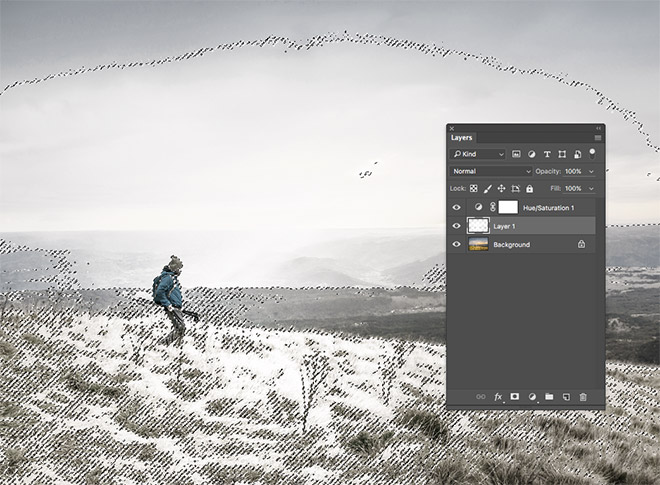
Add a New Layer while the selection is still active then fill that area with white with the shortcut CMD+Backspace. Reduce the Opacity to 70-80% to add some detail to the snow cover by letting the base image appear a little.
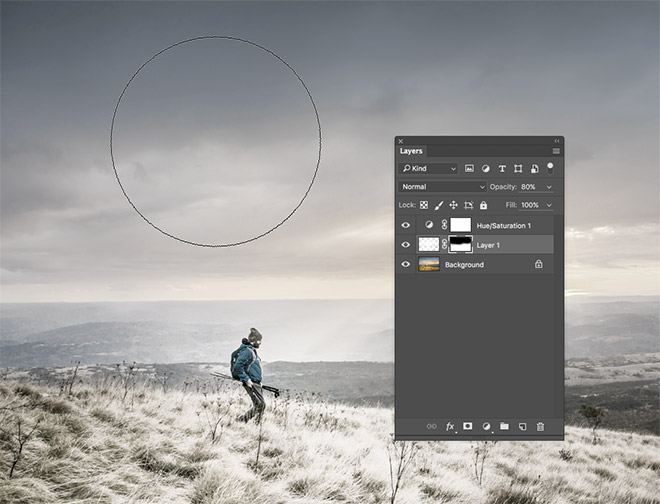
Sometimes this white overlap applied to unnecessary areas. Add a layer mask, then use an eraser with a
soft brush to erase those unwanted areas like the sky in this case.
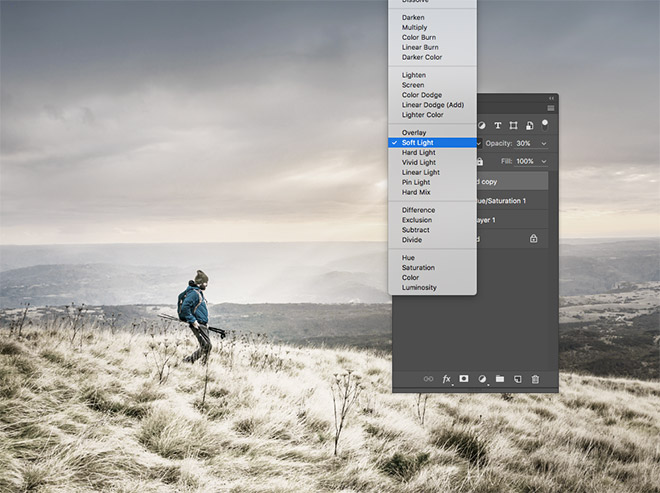
Drag the Background layer to the New Layer icon or select it and CMD+Jhit the shortcut to duplicate it, then place the new copy on top of the Layers panel. Change the blending mode to Soft Light then lower the Opacity to 20-30% to bring back some contrast to the image.
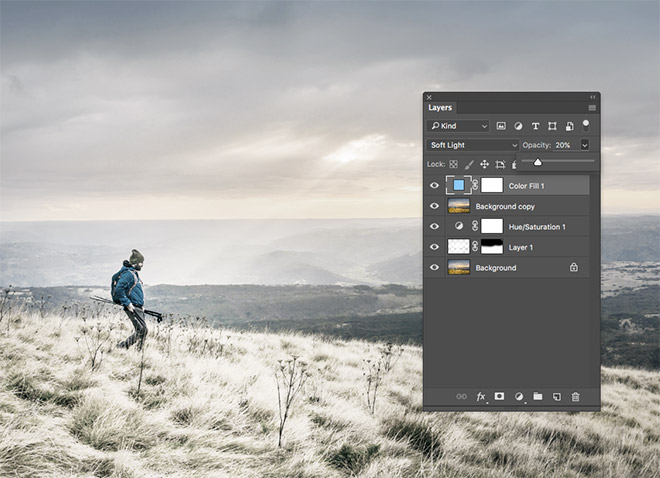
Add a Solid Color Adjustments Layer and choose a Cyan color as 7bbdf6. Change the layer's blending properties to Soft Light and lower the Opacity to 10-20% to apply the effect of the cool blue tint effect.
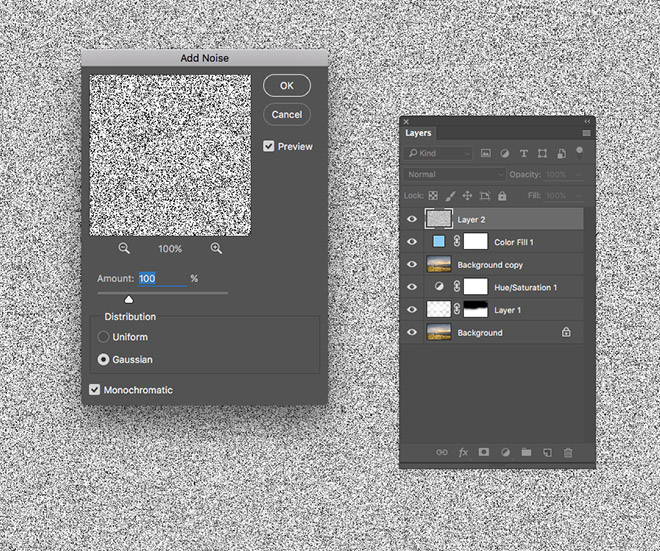
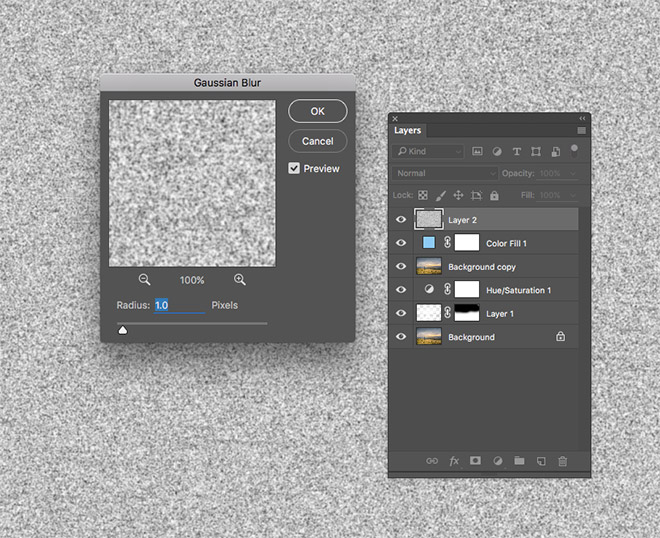
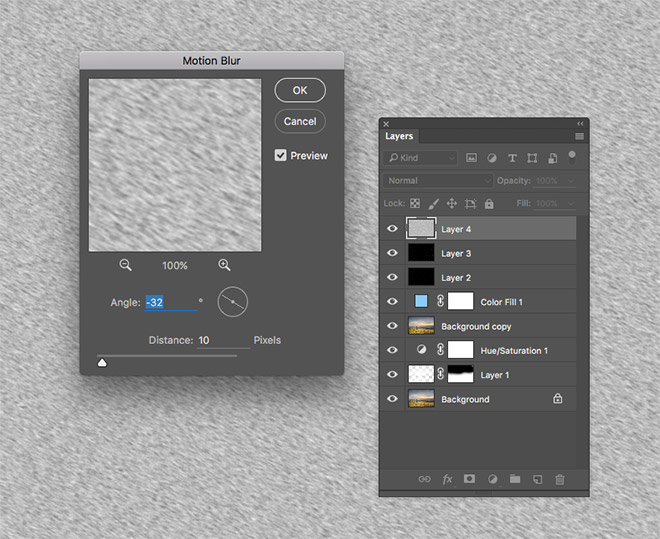
Create a New Layer and fill it with white. Go to the menu
Filter > Noise > Add Noise
Choose 100 for Gaussian and enable Monochromatic.
Go directly to the menu
Filter > Blur > Gaussian Blur
To remove the noise from the noise by setting 1px to blur.
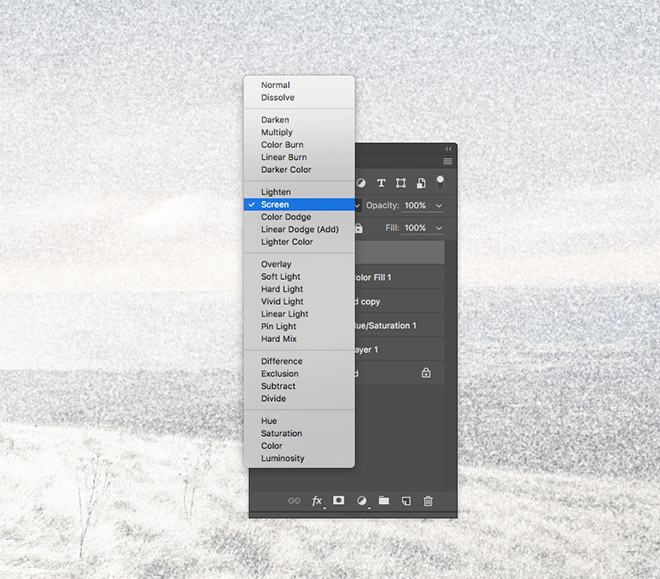
Change the layer's blending properties to Screen to convert the black in the layer to transparent, allowing only the white to appear.
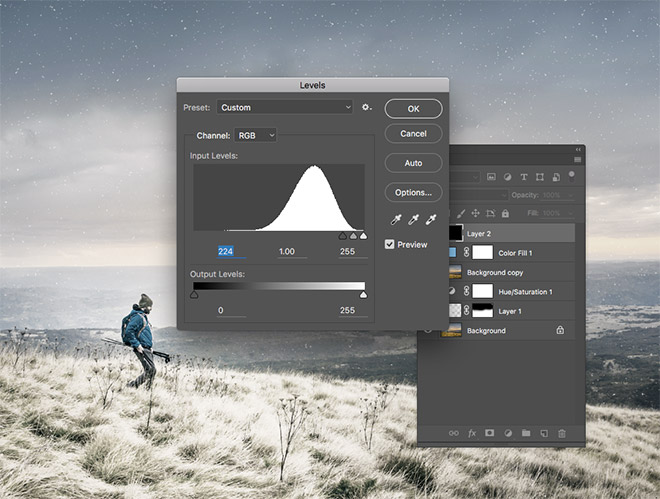
Go to the menu
Image > Adjustments > Levels
Or press the shortcut, CMD+Lthen move the Shadows latch right to soften the intensity of the white noise and make it look like little snowflakes.
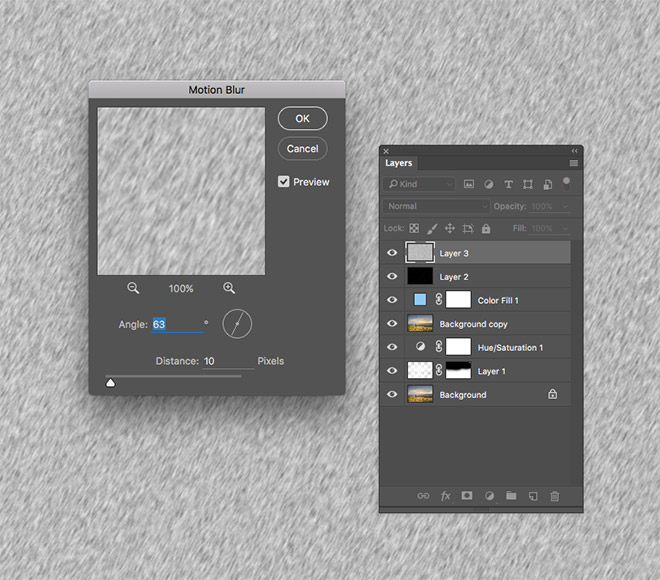
Add a New Layer and follow the same previous steps of coloring with white, adding noise and then blurring, but this time the Motion Blur will have a value of 10px and a slight skew angle.
Use the Levels to soften the intensity of the snow pattern then tap the shortcut CMD+Tto transform the second snow layer. Keep pressing Altand Shiftwhile enlarging the layer to maintain centralization and aspect ratio. Usually when you zoom in on bitmap designs, the design will be distorted a little, which is actually what we aim for with this snow effect.
Add a third snow layer by following the same steps above, changing the blur direction this time and making the layer size even more. These three layers of snow add depth to the effect, with blurry snowflakes in the foreground through smaller snowflakes in the background.
Now we have finished converting a lively summer scene into a snowy winter scene, with the help of Photoshop tools and adjustments. Hue / Saturation helped replace warm colors with cool colors, while the Range Selection tool helped select grasses and foliage to apply effect to them. The effect is enhanced by the realistic snow effect made entirely in Photoshop.
تعليقات
إرسال تعليق